In this article, we will be sharing with you all How to Temporarily Root Android device using Magisk. Rooting a device has many repercussions, some good and some bad. Hence, even if a person is a tech enthusiast, they might hesitate before rooting their device. But then, of course, a tech geek can control only a little when it comes to tweaking their device.
Thus, for all those techy geeks who wish to root their device, yet are not sure, you have an option to root android device temporarily using Magisk. If you are still wondering, then yes, it is possible to temporarily root android device with Magisk.
Considering all the probable risks and privacy issues that can come with rooting a device, for those who wish to stay on the safe side yet experience the modifications and admin-level control after rooting the phone, temporarily rooting android device with magisk is a great option. So, if you wish to do the same, then keep reading further for a detailed guide.
How to Temporarily Root Android Device using Magisk
Given below is a detailed step-by-step description of how to root android device temporarily using Magisk. Follow the below steps in the given order and with utmost attention to not cause any mishap. We at www.androidjungles.com will not be responsible for any if any, damage caused to your device by following the below guide. Perform at your own peril.
Before you proceed to root Android device temporarily using Magisk, make sure to perform all the below requirements.
Prerequisites
- Take a complete backup of your device data as rooting will wipe off all the data.
- Make sure to have at least 70% battery power on your phone or else it might switch off and you might have to follow the entire procedure once again.
- Download Android SDK Platform-tools on your PC. Extract the tools to any location that is convenient for you on the PC. After extracting, you will get the Platform tools folder.
- Enable USB Debugging – Before you follow the next prerequisite, make sure to enable USB Debugging on your device. For this, you can follow the easy guide here to enable USB Debugging. Or, just go to Settings> About Phone> Tap on Build number for 7 to 8 times. Go back to Settings. Here you will see a new option – Developers Option. Tap on it and then scroll down and then enable USB Debugging toggle.
- Unlock Device Bootloader – The first step and a prerequisite to root android device is to unlock bootloader of that device. Just note that, when you unlock bootloader of your device, your device data will be wiped off. So make sure to take a complete backup beforehand. You can follow any of the below guides to unlock bootloader on android device.
How to Unlock Bootloader Using Fastboot on Android
How to Unlock Bootloader Without PC on Android
How to Unlock Bootloader on Any Xiaomi Devices
Step 1: Get Stock Boot.img file
Download the stock firmware file which you have installed on your device. Just note that the firmware version must match the installed version on your device. When you have downloaded the firmware file, extract it to any location on your PC.
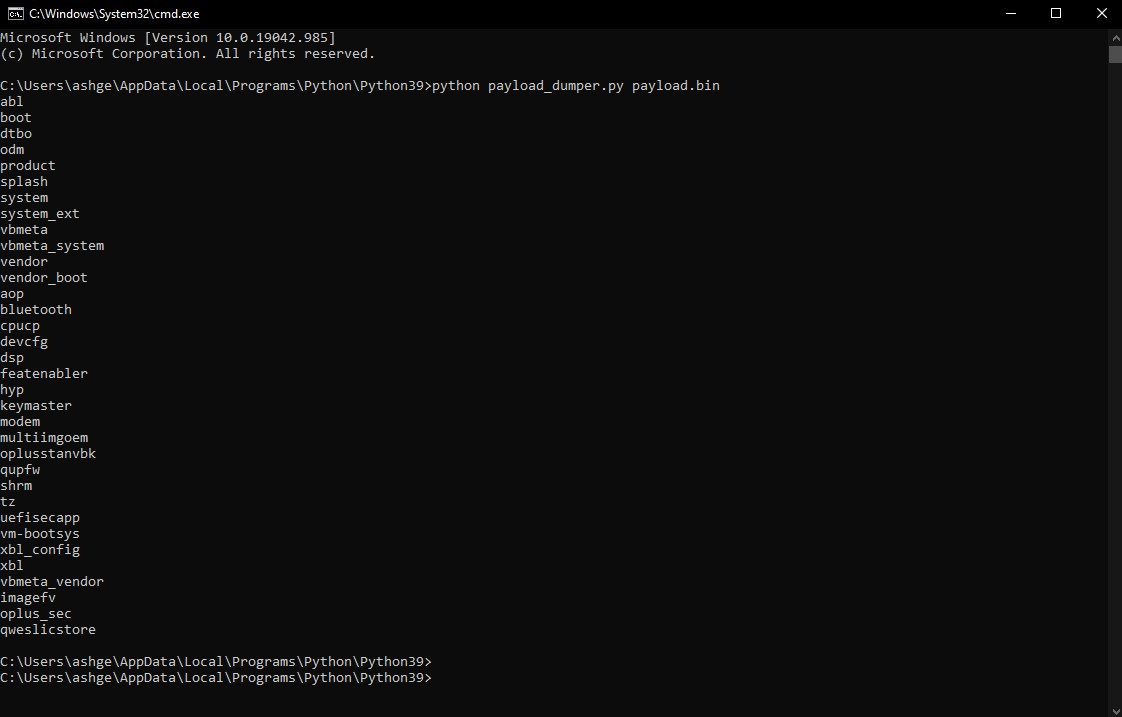
In case you have a Pixel device, then you will see the boot.img file directly. Whereas, the OnePlus users will directly get the payload.bin file. You can check our guide here to know how to extract payload.bin file and get stock boot image file.
In the same way, Realme and Oppo users will see the OZIP file. Coming to the Sony device, the file will come as boot.sin file. In case you have a Sony device and want to extract Sony Boot.sin file and get Stock boot.img file, then check the guide here.
Step 2: Patch Stock Boot.img file using Magisk
Once you have extracted the file, now you can patch it. For this follow the below steps –
- To start with, move the boot.img file to the device.
- Now install Magisk app on your phone.
- Open the app and then tap on Install option on the screen.
- While choosing the method type, tap on Select and Patch a file.
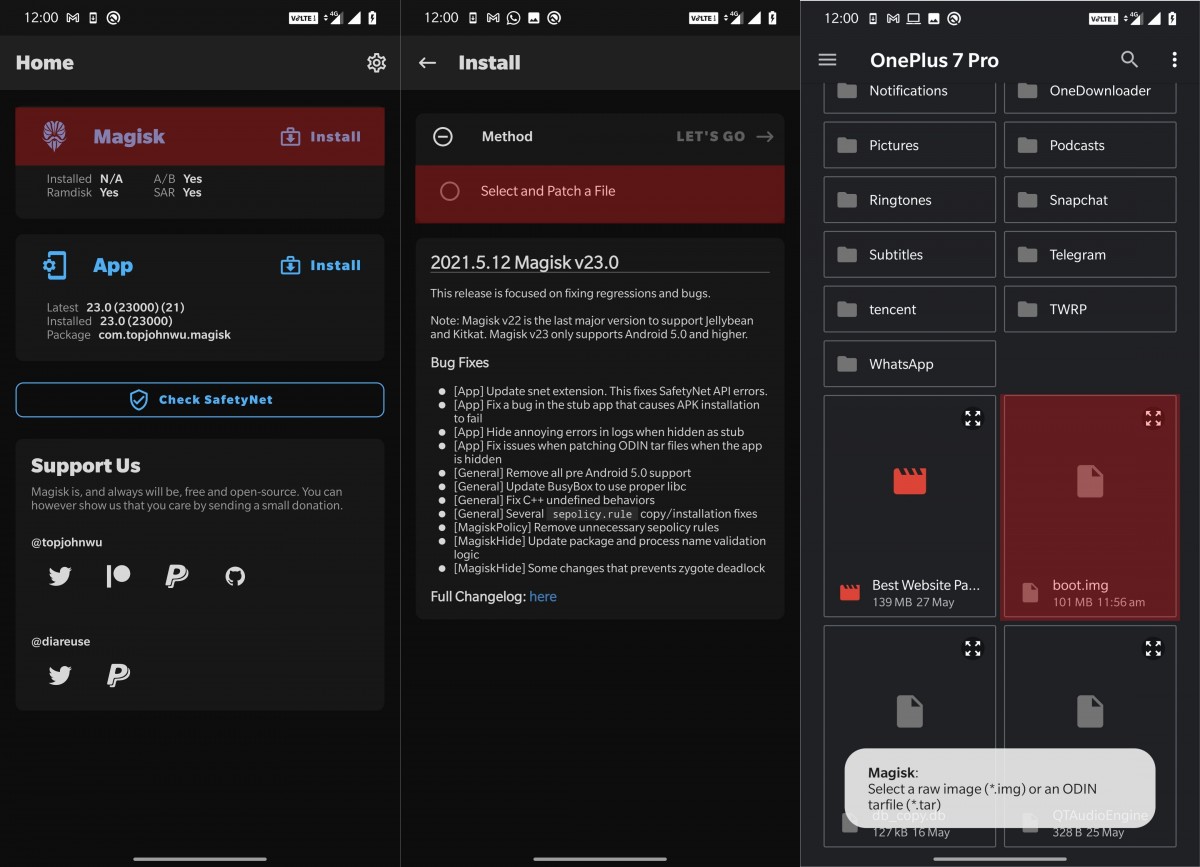
- Go to the extracted boot.img file and then choose it.
- Now tap on ‘Let’s Go’ button present at the top corner on the right.
- Soon Magisk will load and patch the boot.img file.
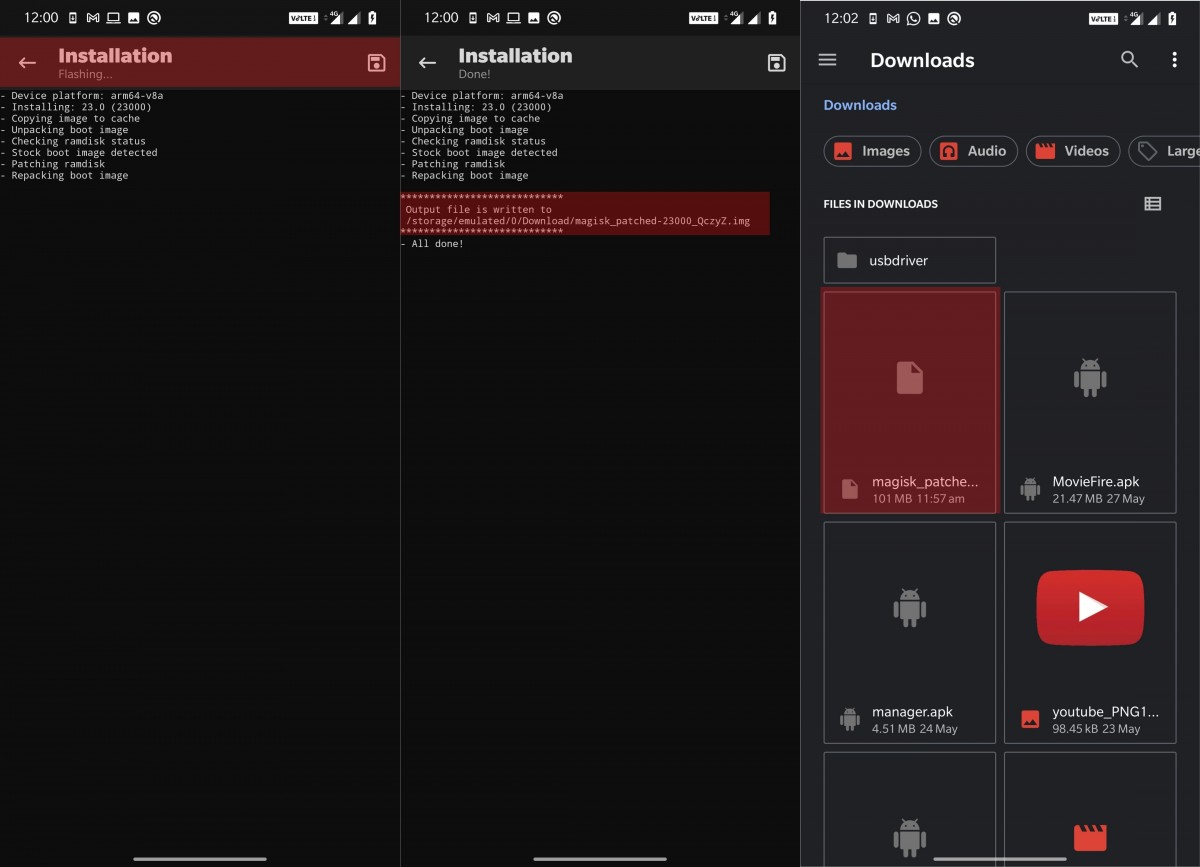
After the process is done, you will receive the Download Complete message. The patched boot.img file will be saved in the Internal Storage section in Downloads. The file will be named as magisk_patched.img with some random numbers after it. You will have to delete the numbers so as to keep the file name as magisk_patched.img.
Also see – How to Fix Magisk Hide issues
Step 3: Boot device to Fastboot mode
- Go to the Platform tools folder on your PC, that we got in prerequisites.
- Connect your device to the PC using USB Cables. See that you have enabled USB Debugging.
- Now go to the Platform tools folder and enter ‘cmd’ in the address bar without quotation marks. Then hit the Enter key on the Keyboard.
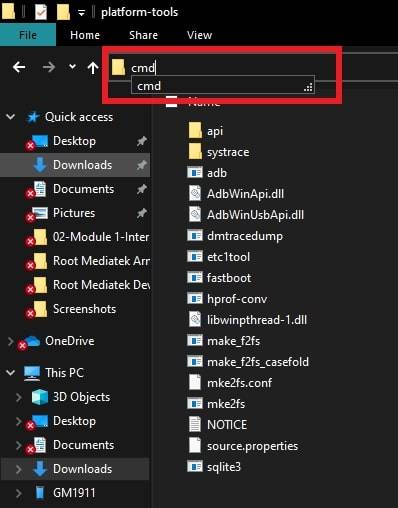
command-prompt-adb - This will open the Command Prompt Window.
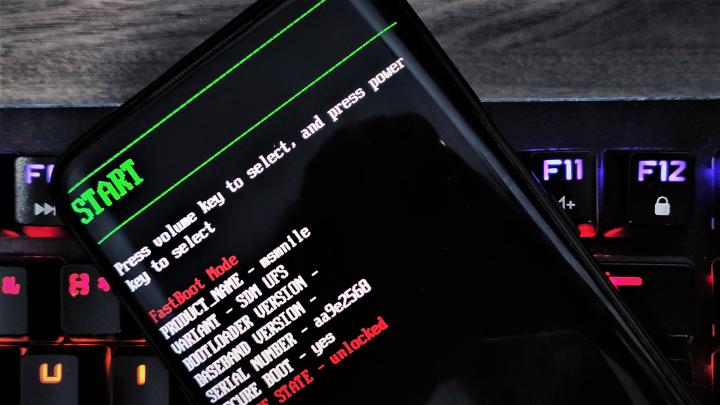
- Enter the below command in the command prompt window so as to boot device into fastboot mode –
adb reboot bootloader
Step 4: Boot Magisk Patched Boot.img
Finally, we will root your device temporarily using Magisk.
- Once you have entered into fastboot mode, have your device connected to the PC and the command prompt window open on the screen, you can proceed further to root device temporarily.
- Move the magisk_patched.img file to the platform-tools folder.
- Now in the command prompt window, enter the below command to boot device into the rooted OS using patched Magisk boot image file –
fastboot flash boot magisk_patched.img
- After the file is flashed, enter the below command in the cmd window so as to boot your device into the OS –
fastboot reboot
Once your device is booted, you have successfully rooted your device temporarily. After you are done, just restart your device. Then you will be booted back to the non-root OS.
Must see –
- How to Download Magisk Module
- How to Install Magisk Module ZIP file
- How to Check and Change Current Active Slot on Android?
- How to Unlock Bootloader and Root OnePlus Nord using Magisk
- How to fix Magisk Install Error 1?
Concluding Words
I hope you all could easily Temporarily Root Android phone using Magisk. Due to the complex nature at times of rooting a device, many people would like to just have a little experience of rooting their device. For such tech geeks, rooting Android device temporarily using Magisk could be assuring and fun.
In case you are stuck at any of the above steps, feel free to ask us in the comment section below. We will come back to help you out.
Happy Androiding:-)
