Hey people, In this article we will share guide on Root MediaTek Device on Locked Bootloader. In this guide we will share all details and guide on How to Root MediaTek Device on Locked Bootloader. So, keep reading.
Root MediaTek Device on Locked Bootloader: Custom Development is a necessity for a Tech enthusiast. With feasible options like the open-source nature of the Android operating system, an entire gamut of customization and mods opens up. One can not only Install custom recoveries like TWRP or OrangeFox recovery on Android Devices but can also Root their Android phones and gain admin-level access of their devices.
This all sounds very fascinating and cakewalk until the prerequisites to perform any flashing, rooting, and modding comes in. We are talking about Unlocking the bootloader. No matter which type of customization it is, most of them require the bootloader of the device to be unlocked.
Now if you are wondering if there’s a plethora of options to customize my phone then why bother unlocking a bootloader? Well, the thing is, once you unlock the bootloader of your device, it will result in a void of warranty and of course the loss of data on your device will be the cherry on the top.
But what if you do not have to unlock the bootloader? Well, to many it would sound funny and illogical but can you doubt the potential of our developers? But wouldn’t that be a dream come true ad a huge relief for all our tech enthusiasts out there?
Imagine, rooting your device without the issues of unlocking the bootloader, let alone the fear of losing a device warranty in the process to gain admin-level control of your own device!
Although it sounds impossible, it is now actually possible to root the MediaTek device with a locked bootloader. And, you can also update Magisk of Rooted MediaTek device having an unlocked bootloader.
Root MediaTek Device on Locked Bootloader
Hold on to your curiosity and scroll down to know how you can perform both the processes in depth. However, before you begin, here are some crucial points you must take care of before starting the procedure to root the MTK device on a locked bootloader.
Note –
- The below-mentioned process is NOT Compatible with Magisk v22. It is compatible only with Magisk v19.4 to Magisk v21.4. Make a note of this and strictly follow the version or else you might end up with some issue.
- As we have a locked bootloader, you will not be able to modify the boot partition. And hence, you CANNOT use the Direct Method of Installation of Magisk in order to Update it.
- The below guide is compatible with only the MediaTek ARMV8 chipset which further includes the MT67xx, MT816x, MT817x, or MT6580 chipsets.
How to Root MediaTek Device on Locked Bootloader
Assuming that you have taken all the above notes into consideration, we can now begin with the process to root mtk phones on locked bootloader –
Step 1. Set up init.d Support
- First of all, we will have to Download and Install init.d scripts support App from Google Play Store.
-
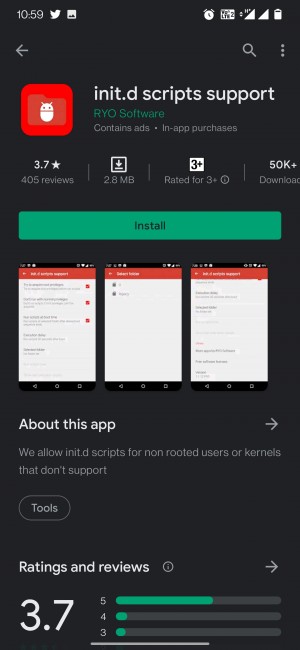
Download init.d script support setup - In the internal storage of your device, create a new folder and name it – init.d
-
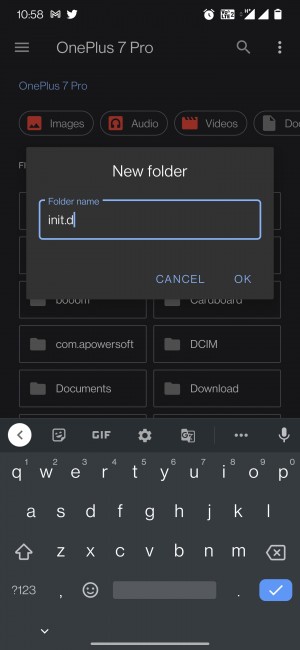
create init.d folder root MediaTek locked bootloader - Now create a new folder inside the init.d folder and give it the name – bin.
-
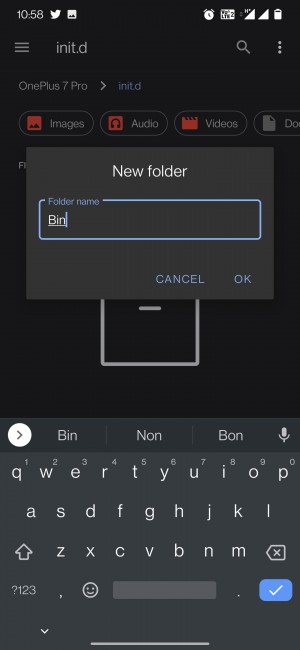
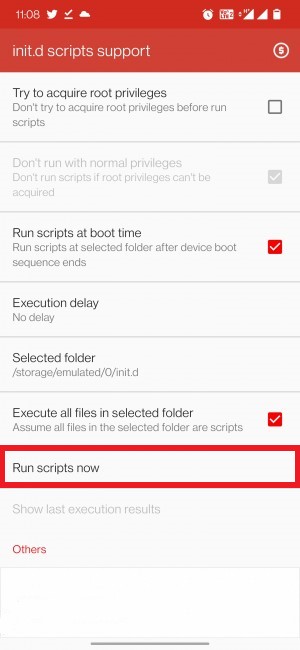
create bin folder root MediaTek locked bootloader - Open init.d scripts support app and set it up. For this,
Try to acquire root privileges – Disable.
Run scripts at boot time – Enable.
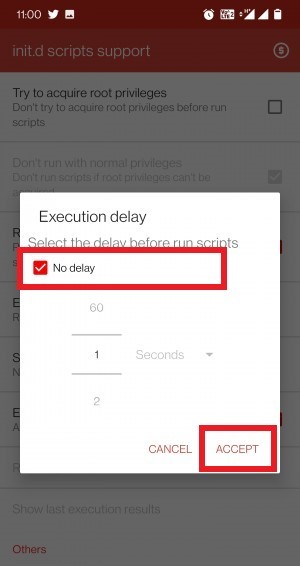
Execution delay: Open this option, check-mark No Delay, and tap Accept.
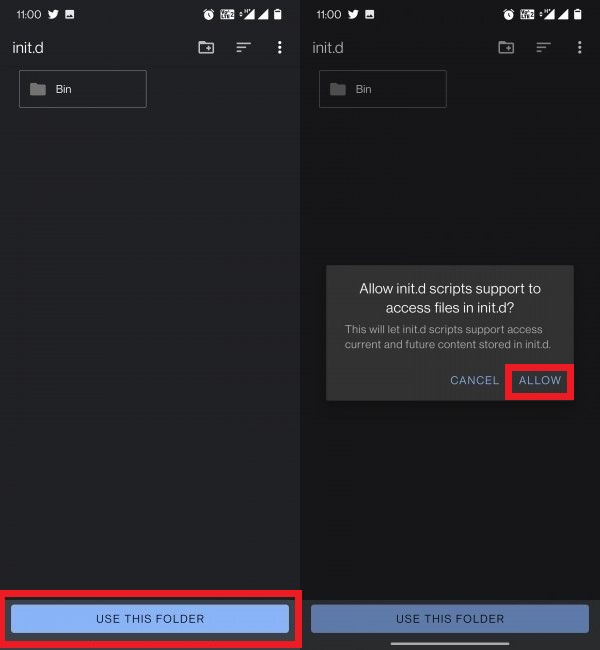
- Select the init.d folder, tap on the folder and then tap on Allow for the permission asked.
-
init.d folder permission root MediaTek locked bootloader - Now, Enable the option of Execute all the files in the selected folder.
-
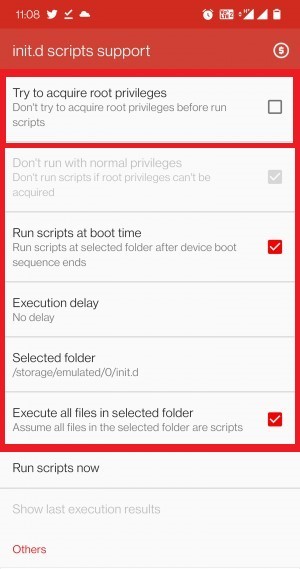
init.d script support setup - Lastly, just check that the folder path is – /storage/emulated/0/init.d. and the init.d script support on your phone is the same s the value shown in the screenshot above.
Step 2. Set up Magisk Boot and MTK-SU
- Download and install the Magisk Manager app on your phone.
- Now, Download the magisk-boot.zip file and extract the content of its file.
- Once extracted, you will get a magisk-boot. sh file.
-
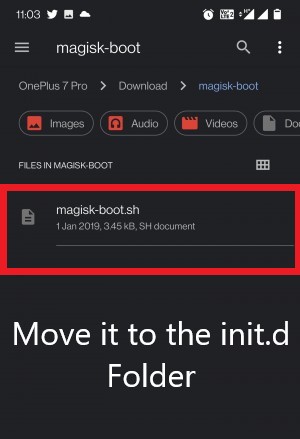
magisk boot sh root mediatek locked bootloader - Move this file to the init.d folder.
- Now download an mtk-su_r23.zip file and extract it.
- You will see 2 folders – arm and arm64.
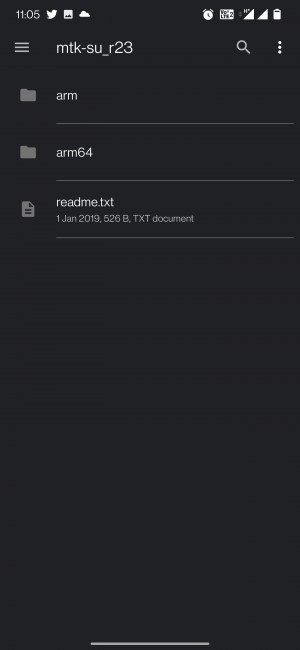
- Simply go to the folder that is in correspondence to the CPU of your device and copy the mtk-su file from that folder.
- Paste this mtk-su file in the bin folder inside the init.d folder created in the internal storage of your device.
- Now Download the Magisk ZIP file, but make sure to download the Magisk version from v19.4 to 21.4 only. Do not go for the latest version as it is not yet compatible. We will let you know when the process supports the latest version. You can bookmark our page to stay updated.
- Extract magisk file and go to its arm folder. Here, copy the needed Magiskinit file. This will be present as magiskinit for 32 bit and magiskinit64 for 64-bit devices. In case you have downloaded the 64-bit folder, then rename that file to magiskinit.
-
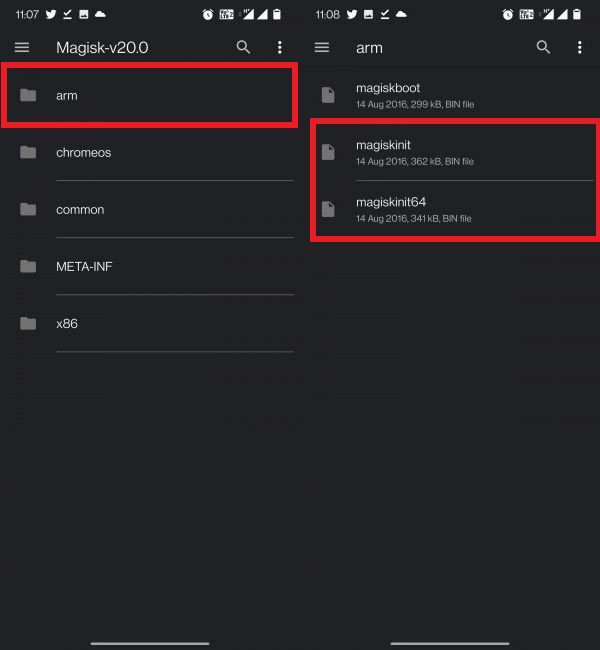
magisk zip root MediaTek locked bootloader - Next, move this file to the bin folder created in the init.d folder.
- Open the init.d scripts support app and tap on Run scripts now. Soon the script will be executed and you will see an output on the screen.
-
Temporary root by diplomatic@XDA Home URL: https://forum.xda-developers.com/android/development/amazing-temp-root-mediatek-armv8-t3922213 -------------------------------------------------- /data/data/com.ryosoftware.initd/files/bin UID: 0 cap: 3fffffffff selinux: permissive Load policy from: /sys/fs/selinux/policy 20.3:MAGISK (20300) client: launching new main daemon process
- Now open Magisk Manager app.
- You will see a prompt asking “Requires additional Setup“. Simply select Yes and be patient for a while until the process finishes.
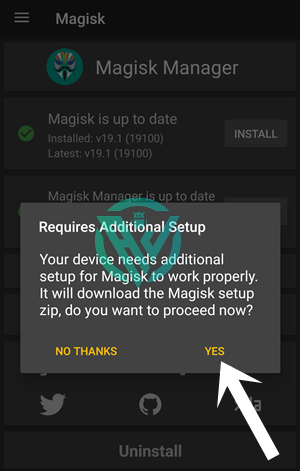
Your device will reboot automatically once the process is done with. That was how easy it was to Root MediaTek Device on Locked Bootloader.
How to Update Magisk on a Locked Bootloader Rooted MediaTek Device?
A locked bootloader will not let you allow to update the device using the traditional direct installation method. However, what you can do is –
- Download the latest Magisk ZIP file and extract it.
- Copy Magiskinit file and paste it into the bin folder.
- Lastly, open init.d scripts support app and then run the scripts.
You are done here. You have successfully updated Magisk on a Mediatek device with a locked bootloader.
Concluding Words
I hope our guide helped you out in some way. I am assuming you could root the MediaTek device with a locked bootloader and could also know how to update the magisk on mtk device with a locked bootloader.
Rooting a device with a locked bootloader is a dream come true for many who simply abstain from rooting their devices in the fear of losing their warranty. But not anymore, as with the above process, you can easily root MTK device with a locked bootloader and not fear about losing its warranty.
For more such amazing articles, stay tuned with us. If there is anything you wish to ask, feel free to shoot it at us. We will be glad to help you out.
Happy Androiding:-)
