In this article, we will be sharing a guide on How to Fix Unauthorized Devices with ADB Commands. ADB Commands form a crucial step when it comes to android customization processes.
Be it Rooting Your Android Phone, Installing TWRP Recovery, or Flashing firmware, all of these processes and many such others require ADB Commands. Now just like any other mechanism, this too comes with its own set of flaws.
While using ADB, you might encounter an error named Unauthorized Device Error. This error occurs when you haven’t given the authorization permission. Do not panic if you are getting this error; following the below guide will help you fix it easily.
Reason for Unauthorized ADB Devices Error
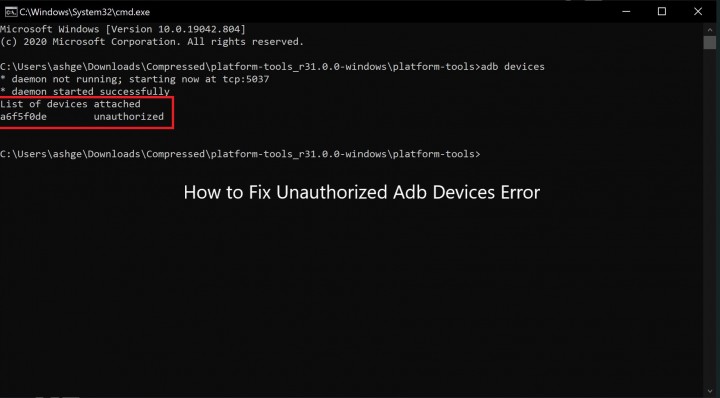
The major reason for unauthorized device error is in the name itself. The error takes place when you have not given authorization to the connection.
If you think that the culprit would have been the outdated USB Drivers or missing ADB or Fastboot files, you are wrong, my friend. This issue comes only due to a lack of authorization.
So if you are getting this error, go ahead and try out the below easy solution to fix unauthorized devices with ADB commands.
How to Fix Unauthorized Devices with ADB Commands
Here is a step by step easy guide on how to fix an Unauthorized device with ADB commands –
Step 1. Download and Install Android SDK Platform Tool
First, download Android SDK Platform-tools or Minimal ADB and Fastboot tools binary packages from Google Play Store.
You should always download these platform-tools from a reliable source like the Play Store Store and not from any third-party sources.
After the download is over, extract the file to any location on your PC, and you will get your ADB and Fastboot Files.
Step 2. Enable USB Debugging
Once you have your ADB and Fastboot files, go ahead to Enable USB Debugging. For this, you will have to –
-
- Go to Settings > About Phone > Tap on Build Number 7 times. For Xiaomi devices, the users will have to tap on the MIUI version 7 times.
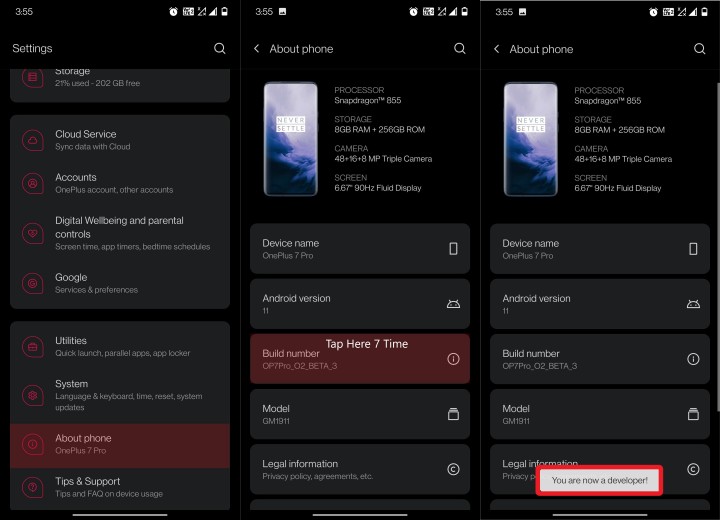
- you are now a developer
- You will then receive a toast message that You are now a developer.
- Now go back to Settings > System > Advanced (or Additional Settings).
- On this screen, You will see the Developer Options.
- Just tap on the same and go to the bottom of the USB Debugging option and enable it using the toggle in front of the option.
- A pop-up will appear on the screen asking you to Allow USB Debugging; tap on the OK option.
-
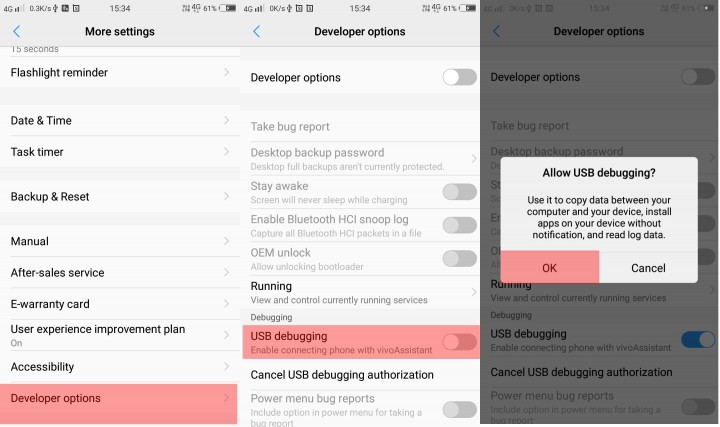
USB debugging android 10
Step 3. Authorize USB Debugging
So here is the final and most important step to fix the Unauthorized Device error using ADB commands. Follow it with utmost attention to keep the process going Smooth.
- Firstly, make sure that you have successfully followed the above two steps.
- And then, we will connect your device to the PC using USB cables.
Now you will get 3 different fixes for the error, as shown below. You can try any one of the below solutions to fix the issue.
Fix 1.
- When you connect your device to the PC, you will get the prompt asking to Allow USB Debugging using your PC’s RSA fingerprint key.
- Allow, and if you want to or if the PC is yours, you can also choose the option of “Always allow from this computer”.
-
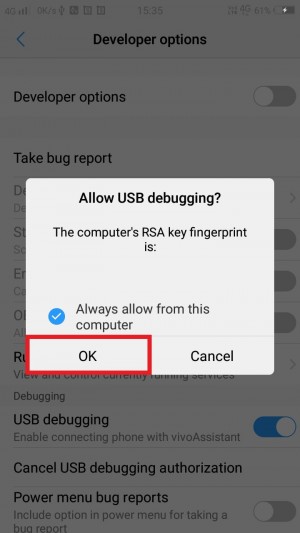
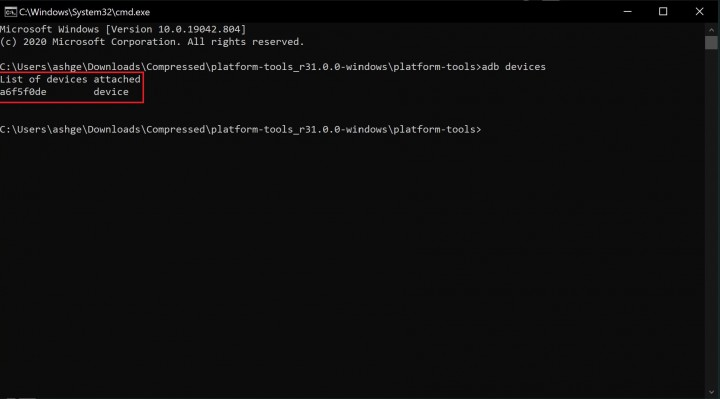
RSA fingerprint pc adb unauthorized - However, if you haven’t received the prompt yet, do not panic. Go to the Platform-tools folder (ADB and Fastboot Tools Folder) and enter cmd in the address bar of this folder.
- This will open the command prompt. Just enter the below command, and you will be done.
adb devices
Fix 2.
- If before you Allowed RSA Fingerprint key, you will now get an alphanumeric ID along with the device keyword.
-

RSA fingerprint pc adb unauthorized - But, if you haven’t received the prompt earlier, as mentioned in Fix 1., then by following the Fix 1 and executing the ‘ADB devices’ command, you will definitely get the prompt.
- After this, go to your device and tap on Allow in the popup on the screen.
- You are done here!
Fix 3.
In case none of the above 2 solutions has worked out, try following this one.
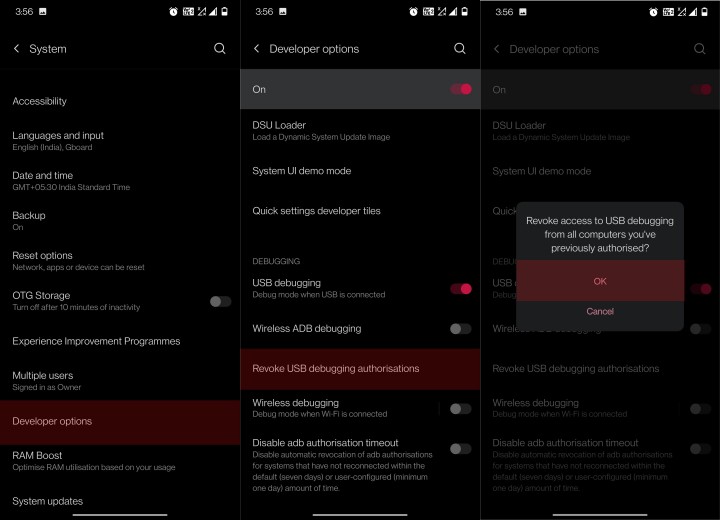
- On your device, Go to the Settings > System > Advanced > Developer Options.
- Then go to the Debugging section. Here, tap on Revoke USB Debugging Authorization.
- Lastly, tap on OK in the dialogue box that appears. That is it.
-
revoke USB debugging adb unauthorized
3. One last step.
- Connect your device to the PC. Make sure that the USB Debugging is enabled.
- Go to the Platform-tools folder (ADB and Fastboot Tools Folder) and enter cmd in the address bar of this folder.
-
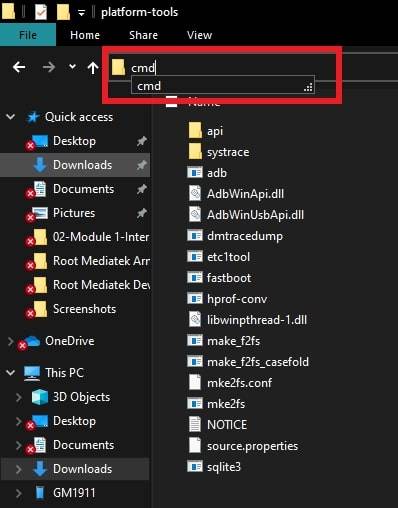
ADB Fastboot cmd window - This will open the command prompt. Just enter the below command
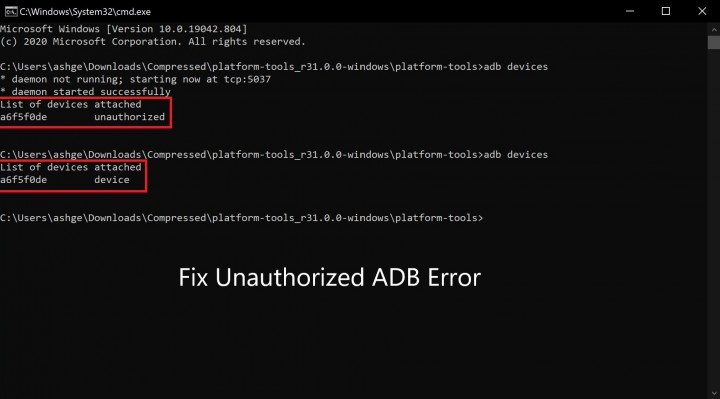
adb devices
You will now get a prompt on your device. Just tap on Allow. To check if your device has been recognized, you can verify using the ADB devices command again.
That is how easy it was to Fix Unauthorized Devices with ADB Commands.
Concluding Words
I hope you all could easily fix Unauthorized Devices with ADB Commands. In case of any doubts, you can contact us in the comment section below.
If you have any other queries or questions about Android Debugging Bridge or ADB, feel free to ask us away.
Happy Androiding:-)
